
Quick answer: Safe, effective shin splint exercises follow a clear progression: gentle mobility and pain-easing work first, then calf and tibialis anterior strengthening once the acute pain has settled, giving each stage roughly four to six weeks before expecting real results. Many people find toe raises and calf raises, done consistently with slow, controlled reps, do more for long-term relief than any single stretch. The part that trips people up isn’t which exercises to do, it’s doing high-impact or explosive movements before the tissue is genuinely ready, which is exactly what tends to set recovery back the most.
If you want a safe exercise routine for your shin splints but you’re a little nervous about making things worse, that caution is actually a good instinct. Doing the wrong exercise at the wrong stage is a real way to set yourself back, but avoiding movement altogether isn’t the answer either. Here’s exactly what to do, and just as importantly, what to hold off on until you’re genuinely ready.
What Shin Splint Exercises Can (And Can’t) Do
Exercise plays a genuinely important role in shin splint recovery, both easing symptoms in the short term and, more importantly, addressing the muscle weakness and imbalance that often contributes to the problem in the first place. What exercise alone can’t do is fix training load or footwear issues that are still actively overloading the shin, which is why even a perfect exercise routine won’t hold if you jump straight back to the mileage that caused this.
Think of shin splint exercises as one part of a bigger picture rather than a standalone fix. They work best alongside genuine load management, and expecting exercises to compensate for continuing to train exactly as you were before the pain started is one of the more common reasons people feel stuck despite doing “everything right.”
It also helps to set realistic expectations for the timeline. Muscles and tendons adapt gradually, not overnight, so give any new routine four to six weeks of real consistency before judging whether it’s working. Many people abandon a genuinely good exercise plan after a week or two simply because they expected faster results than tissue adaptation actually allows.
Early-Stage Exercises To Calm Things Down
In the more painful early stage, the goal is gentle movement and circulation, not loading. Ankle circles and gentle calf stretches, holding each for twenty to thirty seconds without forcing anything, help keep the area mobile without adding stress to the irritated tissue. A simple seated or standing calf stretch against a wall, front knee bent and back leg straight, is a good, low-risk place to start.
Self-massage or foam rolling along the calf, avoiding direct pressure on the most tender spot on the shin itself, can also help with the general tightness that builds up around an irritated shin. This stage isn’t about pushing through discomfort, it’s about creating the conditions for the strengthening work in the next stage to actually stick.
Elevating the leg for a few minutes after activity, and applying ice for ten to fifteen minutes if things feel particularly irritated, both belong here too. None of these early-stage measures are glamorous, but skipping them and jumping straight to strengthening work before the acute irritation has actually settled is a common reason people feel like their exercises “aren’t working” when really the timing was the problem.
Shin Splint Exercises For Strengthening The Root Cause
Once the sharp, acute pain has genuinely settled, toe raises become one of the most useful shin splint exercises available, since they directly target the tibialis anterior, the muscle running down the front of your shin that plays a big role in controlling foot motion. Standing with your back against a wall, heels planted, slowly lift your toes and the front of your foot as high as comfortable, hold briefly, then lower with control, working toward three sets of fifteen to twenty repetitions.
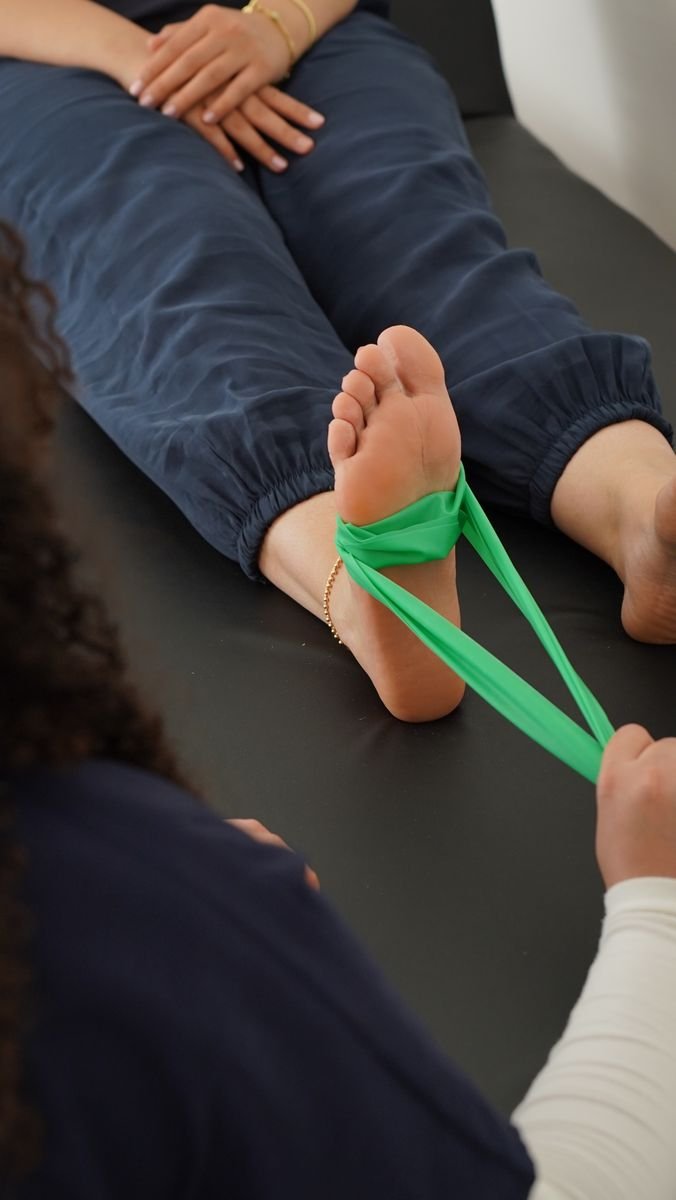
Calf raises deserve equal attention alongside toe raises, not instead of them. Standing on a step with your heels hanging off the edge, rise onto your toes, then lower your heels below the step for a fuller range, starting around two sets of fifteen and building from there. The calf and the tibialis anterior work as a team supporting the shin, and training only one leaves a genuine gap in your recovery. As strength improves, a resistance band looped around the foot adds progressive load to both movements, but that progression should happen gradually, over weeks, not because the basic version started feeling easy after a single session.
Hip and glute strength deserves a mention here too, even though it’s easy to overlook when the pain is clearly in your shin. Weakness higher up the chain changes how force travels down through your leg with every stride, and a simple side-lying leg raise or a standing clamshell with a resistance band around the knees can help address this without placing any real load on the shin itself. It’s not the centrepiece of shin splint exercises, but it’s a genuinely useful supporting piece many people skip entirely.
Shin Splint Exercises To Avoid Until You’re Ready
This is the part most exercise guides skip, and it genuinely matters. High-impact and explosive movements, jump training, box jumps, sprinting, or plyometric drills, should be avoided entirely during the acute phase and saved for later, once strength and mobility have genuinely been rebuilt. Introducing these too early is one of the most reliable ways to turn a manageable overuse injury into a much longer setback.
Running on hard, unforgiving surfaces while still symptomatic, deep stretching that reproduces sharp pain rather than a gentle pull, and any exercise that causes pain to spike rather than settle during or immediately after should also wait. A useful rule of thumb: if an exercise leaves you noticeably worse the next day rather than about the same or better, that’s a sign you’ve progressed too far, too fast, and it’s worth stepping back a stage rather than pushing on regardless.
Barefoot or minimalist-style training, sometimes recommended for other purposes, is also worth holding off on while shins are still irritated, since the reduced cushioning and support can increase load on exactly the tissue you’re trying to protect. Similarly, be cautious with sudden changes to your normal training surface, swapping from a soft track straight onto concrete pavements, for instance, since your shins need time to adapt to any new surface even once symptoms have improved.
How A Guided Program From Sports Rehab Helps
A guided rehab programme takes the guesswork out of exactly when to progress from one stage to the next, which is genuinely difficult to judge accurately on your own. A Rehabilitation Consultation personalises this progression around your specific pain pattern, training history, and goals, rather than a generic printed exercise sheet that assumes everyone heals at the same pace.
Some clients find cupping therapy genuinely useful alongside a structured strengthening programme for managing the muscle tightness that builds up around an irritated shin. Most clients notice that having someone actually check their progress objectively, rather than guessing based on how the leg feels that particular day, means far fewer setbacks along the way.
Getting Back To Running Pain-Free
Once strength has genuinely improved and daily activity is comfortable, a gradual return to running should still build mileage slowly, respecting something like the ten percent rule, increasing weekly distance by no more than around ten percent rather than jumping straight back to your previous volume. Keep the strengthening exercises going during this phase too, not just until the pain disappears, since stopping too early is a common reason shin splints return within a few weeks.
Pay attention to how the shin responds to each small increase, not just whether pain is present at rest. A dull awareness that fades quickly after a run is generally fine to continue monitoring, while anything sharp, focal, or that lingers into the next day is a signal to hold steady rather than progress further that week.
If you’d rather have a proper, personalised progression than guess your way through recovery, Impact Sports Rehabilitation works with runners and athletes across Eccles, Salford, Trafford, and the wider Greater Manchester area on exactly this. Ask about an online consultation if you’re further afield.
Frequently Asked Questions
Which shin splint exercises should I actually start with?
If you’re still in the more painful early stage, start with gentle ankle circles and calf stretches rather than strengthening work, since loading an irritated shin too early tends to backfire. Once the sharp pain has settled, toe raises and calf raises become the main focus, built up gradually over several weeks.
How do I know if an exercise is making things worse rather than helping?
If you feel noticeably more sore or sharp the day after an exercise session compared to how you felt before, that’s a sign you’ve progressed too quickly and should scale back for a week. Many people find that a mild, brief pull during a stretch is normal, but any sharp or worsening pain during the exercise itself is not something to push through.
Can I do calf raises and toe raises every day?
Most people can do these daily once past the acute, sharp-pain stage, though giving the tissue a rest day here and there is fine and won’t undo your progress. Most clients notice consistency over several weeks matters far more than doing every single exercise perfectly every day without exception.
Is stretching enough, or do I really need strengthening too?
Stretching alone tends to offer temporary relief without addressing the muscle weakness that often contributes to shin splints developing in the first place. In our experience, clients who combine both, rather than relying on stretching alone, see far more lasting improvement.
When is it safe to add running back into my exercise routine?
Once daily activities are comfortable and your strengthening exercises are pain-free through a full range of motion, a very gradual, short, and genuinely pain-free jog is usually the next step, built up slowly rather than jumping back to your old distance. If you’re at all unsure whether you’re ready, a proper assessment at Impact Sports Rehabilitation can confirm rather than leaving it to guesswork.
This article is provided for general educational purposes by Impact Sports Rehabilitation and does not constitute medical advice, diagnosis, or treatment. Stop any exercise that increases pain and seek clinical assessment if pain is severe, focal, or worsening rather than improving, since this can indicate a stress fracture rather than shin splints; nothing in this article should be used to self-diagnose. Always seek the guidance of a doctor or other qualified health provider with any questions about your specific injury or condition.